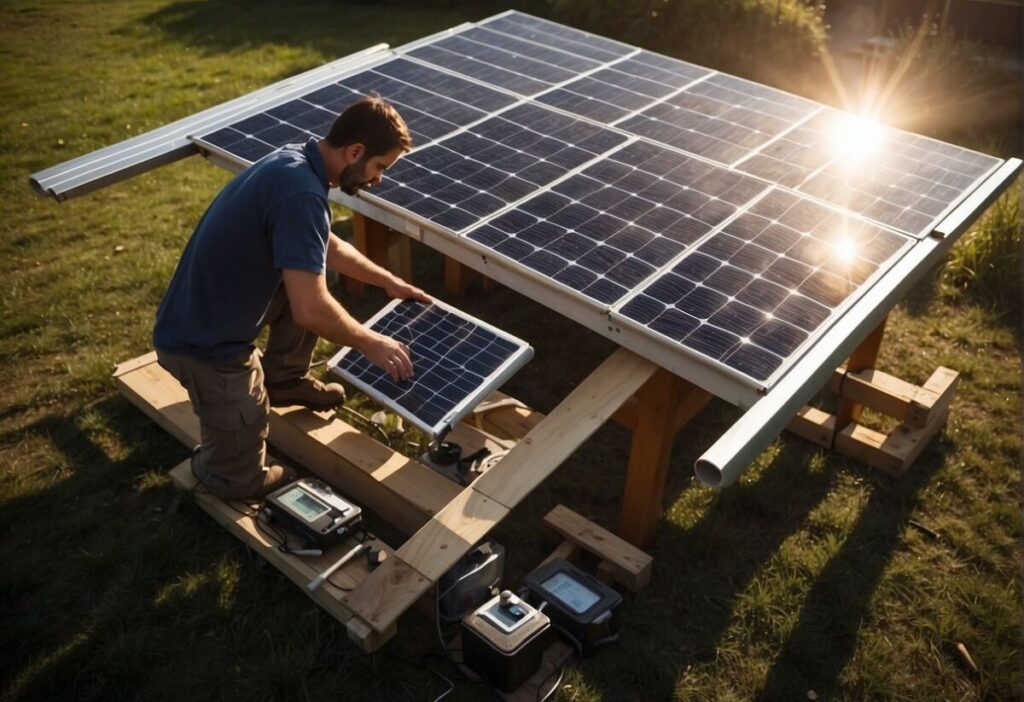
Venturing into the realm of solar energy with do-it-yourself solar panels is an empowering step towards energy independence and environmental stewardship. As we embrace the challenge, we’re contributing to a greener future and potentially reaping financial benefits in the long run.
Solar power harnesses the sun’s natural energy, a renewable resource that is both sustainable and plentiful. By building our own solar panels, we take control of our energy production and move towards a self-sufficient lifestyle.

For those of us at the beginning of our solar journey, it’s vital to understand that constructing solar panels requires both a willingness to learn and a commitment to safety.
With the right components—solar cells, a glass panel, and a sturdy frame—and basic soldering know-how, we can assemble a solar panel that fits our specific energy needs.
The process involves linking solar cells together to form a panel, which can then be integrated into a home energy system, whether it’s on-grid or off-grid.
Safety is paramount when working with electrical systems. It’s crucial for us to follow electrical codes, use protective gear, and meticulously ensure each connection is secure to prevent any hazards.
Starting with smaller projects and then scaling up as we gain confidence and skill is a prudent approach. Remember, it’s not just about generating electricity—it’s about doing so responsibly and safely.
The Basics of DIY Solar Panels: What You Need to Know

Venturing into the realm of DIY solar panels, we embark on a path to harness renewable energy and contribute to environmental sustainability. As beginners, it’s key to grasp the system’s components and the steps needed to assemble our solar array.
Materials and Solar Equipment
Our solar panel system will be primarily built of solar cells made from silicon, chosen for its efficiency in converting sunlight into electricity. We can opt for either monocrystalline or polycrystalline panels.
Monocrystalline, recognizable by their uniform color, are known for higher efficiency, while polycrystalline panels with varied hues of blue offer a more cost-effective solution.
List of Basic Components:
- Solar panels: To capture the sun’s energy.
- Racking system: To secure panels on the roof or ground.
- Batteries: To store energy for later use.
- Inverters: To convert solar energy to a form usable in our homes.
Steps for Installation
- Assess our energy usage to determine how many solar panels we need.
- Design the system layout considering the roof space or land for a ground mount.
- Mount the racking system securely, ensuring it is angled to maximize sun exposure.
- Install the solar panels onto the racking system.
- Wire the panels to an inverter, then to our home’s grid.
- Connect to batteries if we require an off-grid solution or want energy storage.
Safety Tips:
- Always disconnect the power before working on the grid.
- Use proper safety equipment, like gloves and goggles.
- Ensure all electrical connections are tight and weatherproof.
- It’s advisable to consult a professional for electrical parts of the installation.
By understanding the solar panel types and employing the correct solar equipment, we lay the foundation for a successful DIY project. Through every panel we install, we weave a narrative of self-sufficiency and a commitment to a cleaner tomorrow.
See Related: Best Solar Power Banks to Buy Today
Step-by-Step Guide to Building Your First Solar Panel

We’ll need a plan and tools to embark on our DIY solar panel journey. Let’s gather our solar cells, preferably polycrystalline, to balance cost and efficiency and ensure a soldering iron, solder, tabbing wire, and a multimeter ready.
- Planning Our Project: We’ll calculate our electricity needs to determine the size of our solar panel. After sketching a blueprint, we must choose a sunny spot, usually the roof, for installation.
- Securing Components: We’ll purchase a DIY solar panel kit, which should include cells, glass for the top layer, encapsulation material, and mounting hardware.
| Materials Needed | Purpose |
|---|---|
| Solar Cells | To convert sunlight to energy |
| Soldering Iron | To connect wire to cells |
| Multimeter | To test voltage and current |
| Glass | To protect the solar cells |
| Encapsulation Material | To seal the cells against the elements |
| Mounting Hardware | To secure the panel on the roof |
- Assembling the Panel: We’ll start by laying out our photovoltaic cells in a grid pattern on a flat surface. We must use gloves to handle the cells, as they are delicate.
- Wiring Our Panel: Carefully, we’ll solder the tabbing wire to connect the cells in series, paying attention so as not to overheat and damage the cells.
- Encapsulation: Once wired, we’ll place our solar cells on the backing board, apply liquid silicon or glue, and cover them with encapsulation material.
- Final Assembly: The glass layer is placed over the encapsulated cells. We must seal the edges to prevent moisture ingress.
Remember, safety comes first! Always use protective gear when soldering and handling glass. To avoid short circuits or electrical hazards, wiring and installation should be done precisely.
Before installation, research local climate considerations, which could influence the positioning and angling of our panel. In regards to inverters and battery banks, ensure they are compatible and have proper warranties.
With patience and care, we’re not just assembling a solar panel but paving our way towards a more renewable future. By taking this small step, we harness the sun’s power and reduce our reliance on non-renewable energy sources.
Tips for Maximizing Efficiency and Savings

When we embark on the journey of assembling DIY solar panels, our ultimate goal is to achieve maximum efficiency and savings. Here are pivotal steps we can take to ensure our solar power system is optimally effective and cost-efficient.
Choose the Right Panels: We should opt for monocrystalline panels with higher efficiency rates. Though they may cost more upfront, their longer lifespan and better performance in low-light conditions make them a valuable investment.
Optimal Placement: Orienting our solar panels to face true south ensures they capture the maximum sunlight. The angle should be adjusted to equal the latitude of our location to maximize sun exposure.
Regular Maintenance: Keeping the panels clean and free from obstructions like leaves or snow can make a significant difference. A dirty solar panel can lose up to 30% efficiency.
Monitor System Performance: Installing a net meter helps us keep track of the energy produced and consumed. This information is crucial for optimizing our energy usage and getting credit from the grid.
Off-Grid Considerations
- Battery Backup: A reliable battery backup is critical for off-grid systems to ensure consistent power supply during non-sun hours or overcast days.
Incentives
- Government Incentives: We must not overlook tax incentives and rebates that can substantially offset installation costs. Understanding the available options from databases such as DSIRE can lead to considerable savings.
Safety Tips
- Installation Safety: During installation, we must follow the manufacturer’s guidelines and
safety protocols to avoid accidents.
Proper Wiring and Handling: Ensuring all electrical connections are secure and using proper handling techniques to prevent damage to the solar panels and ourselves is paramount.
Remember, going solar is a pathway to reducing utility bills and a step towards a more sustainable lifestyle. We can harness the sun’s abundant energy efficiently and responsibly with the right approach.
Common Pitfalls and How to Avoid Them

Embarking on a DIY solar panel installation can be a fulfilling journey toward renewable energy independence. However, we must approach this task with diligence to avoid common pitfalls.
Roof Measurements
Firstly, let’s ensure accurate roof measurements. Ignoring roof obstructions or miscalculating available space leads to potential design flaws.
We should measure our roof meticulously, consider potential structural limitations, and respect safety concerns, especially when installing on high or sloped areas.
System Sizing
Regarding our energy needs, oversizing or undersizing our solar array could either waste resources or fall short of our expectations.
To prevent this, we calculate our household’s energy consumption accurately and scale our system accordingly, ensuring it aligns with the utility bill cut we aim for.
Electrical Work
When it comes to wiring, we need a solid understanding of electrical systems. Grid-tie installations require intricate knowledge of inverters, whether it’s a standard solar inverter or microinverters for each panel.
As DIYers, if we’re not confident in our electrical skills, seeking professional help is wise to prevent accidents and ensure compliance with electrical codes.
Permits and Warranties
Don’t overlook permits and warranties. Acquiring the right permits ensures our setup is legal while maintaining warranties, which means we’re covered for repairs or replacements. Always check with local authorities and product providers!
Installation Tools and Techniques
We use appropriate racks or mounts, whether for roof or ground mounts. Proper torques for fasteners are critical; overtightening can damage equipment.
And let’s not forget about solar panel maintenance; even though panels are low maintenance, they require periodic checks.
Safety First
Safety is paramount. We invest in proper safety gear and never compromise on labor safety practices. If we lack experience, consulting experts or considering solar kits with detailed installation guides is better.
By being aware of these pitfalls, we’re ensuring a successful installation and paving the way for a sustainable, self-sufficient future powered by the sun. Remember, going solar is a step toward energy freedom, one panel at a time.
See Related: Top Solar Gadgets for Eco-Friendly Homes in 2024
Expanding Your DIY Solar Project: Next Steps

After you’ve got your feet wet with basic solar installations, expanding your DIY solar project can take you to new heights of energy independence. Here’s how we can grow our project sustainably and safely.
Choosing the Right Solar Panel Kits
When scaling up, carefully select a home solar panel kit that complements your existing setup. Kits like Grape Solar offer varying wattages to match your energy needs. Ensure the wattage suits your long-term goals, as solar panel kits are the foundation of any expansion.
Upgrading Your Battery Bank
As our project grows, so do our storage needs. A robust battery bank is vital for harnessing and storing energy, especially for those cloudy days. Aim for a balance between capacity and budget to optimize energy usage throughout the year.
Considering Roof and Space Capacity
Not every roof type can support additional panels. We must assess our roof’s structure, angle, and material. Ground-mounted systems or community solar could be our alternative paths if the roof is not viable.
Understanding Net Metering
Net metering policies can vary, but they’re essential to understand. It allows us to send excess energy back to the grid and sometimes offset the cost of our own consumption. So, keeping abreast of local regulations is a must.
Commissioning a Professional
At some point, we might consider consulting a certified solar installer. Their expertise can be invaluable, especially for complex parts of the expansion like electrical work, which could pose safety risks if mishandled.
Embracing DIY Installation
For those of us who prefer the hands-on approach, remember safety comes first. The work by Joshua Pearce on solar DIY projects provides valuable insights. Always wear protective gear, and turn off the main power when working with electrical connections.
By following these steps, we ensure that our DIY solar project thrives and continues to bring us the advantages of renewable energy.


